Phase 1 – Amazon Web Services Environment Build#
This phase of deployment is comprised of logging into the Amazon Web Services (AWS) website, navigating to EC2 to deploy (2) virtual machines using the Ubuntu Server (version 22.04), creating a key pair in the PPK file format, creating a security group, and connecting to the virtual machines using PuTTY.
Navigating to Amazon Web Services and Logging In#
Open the web browser of your choice and navigate to the AWS login portal using the following link: AWS US-East Login Portal
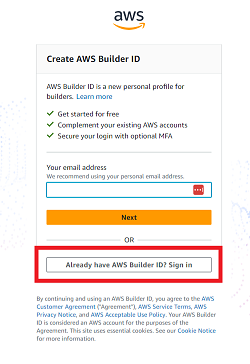
On this page, click
Already have AWS Builder ID? Sign in
- Enter the email address supplied by the AdventureWorks project manager.
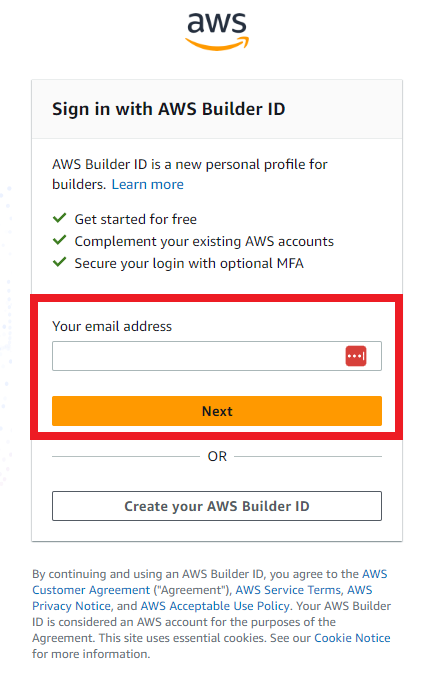
- Enter the password supplied by the AdventureWorks project manager and click
Sign in
No screenshot provided for this step for the purpose of security.
- After logging in, the following dashboard will be focused:
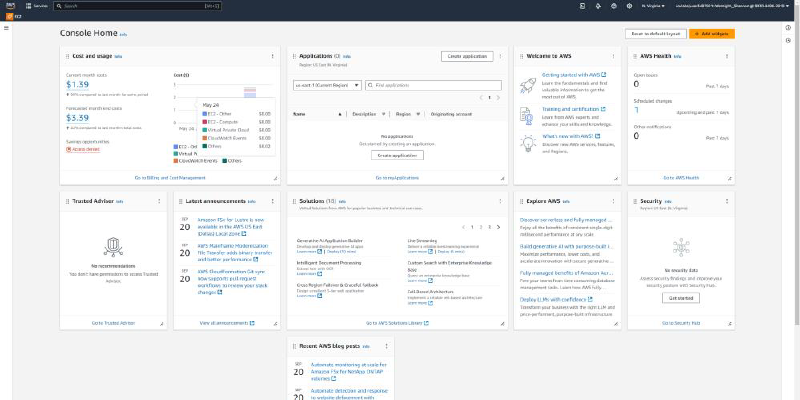
Leave this page open for the next section of this documentation.
Navigating to the EC2 Service through the Amazon Web Services Portal#
This phase of development involves identifying and navigating to the EC2 service in the AWS portal to configure the virtual machines for AdventureWorks.
- On the AWS dashboard, select the
Servicesbutton on the upper left side of the page. This will open theServicestab, a quick overview link to the services AWS provides.
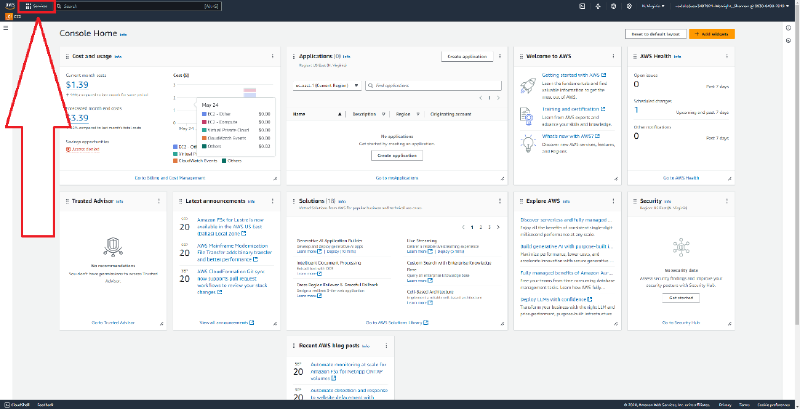
- With the Services tab open, select the
Computebutton. This will open theComputetab, a quick overview link to the computational services AWS provides.
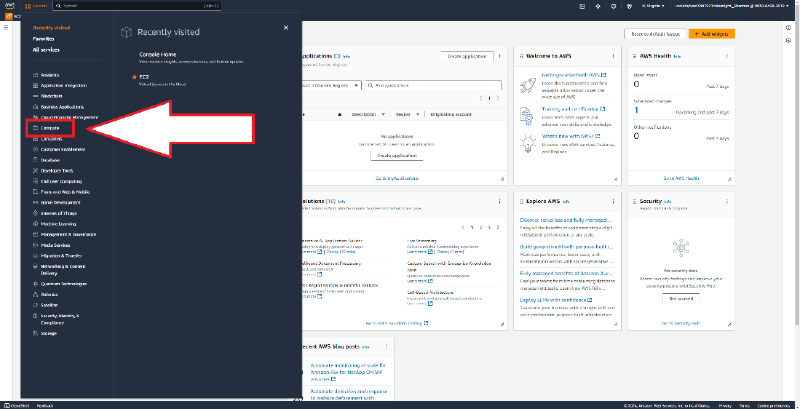
- With the Compute tab open, select the
EC2button. For easy access, you may also choose to click the☆icon next to the button that appears when hovering over the button. Selecting this will add the EC2 Compute Service to your list of favorites for quick access later.
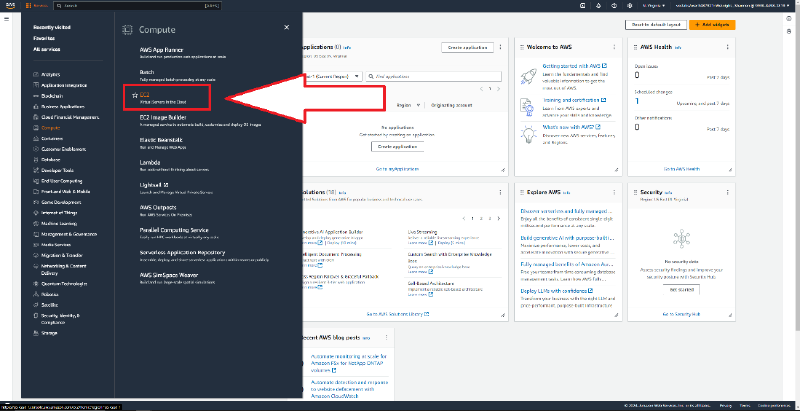
- You have successfully navigated to the
EC2 Compute Servicedashboard:
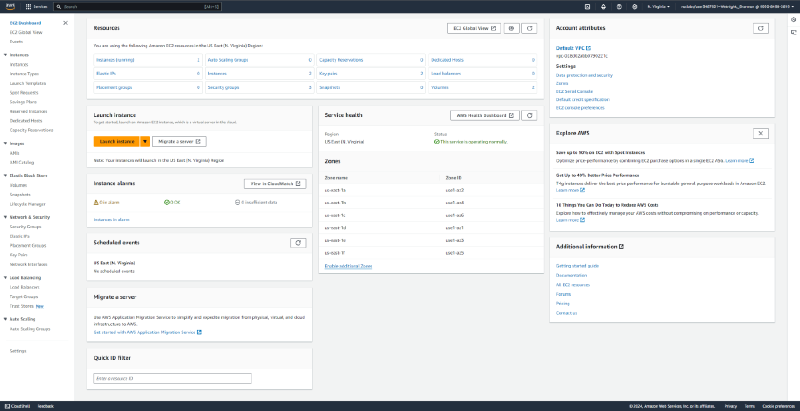
Leave this page open for the next section of this documentation.
Creating (2) Virtual Machines with AWS EC2#
This section involves creating (2) virtual machines in EC2. Additionally, a security key pair and security group will need to be created, which will be subsection steps and is highly crucial to the success of this deployment.
- With the
EC2 Compute Servicedashboard open, clickLaunch instance
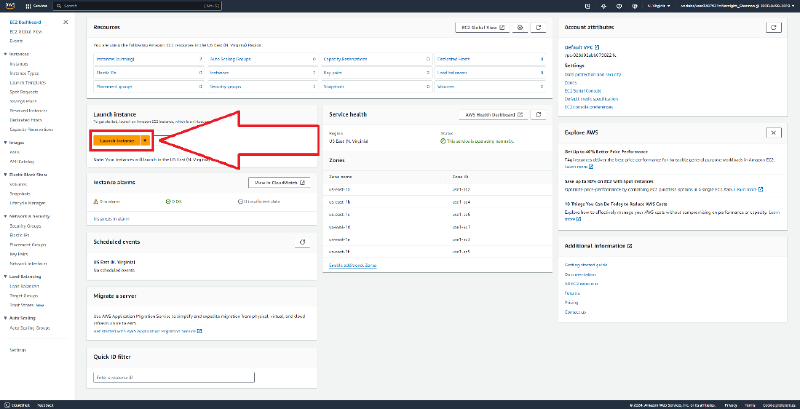
- With the
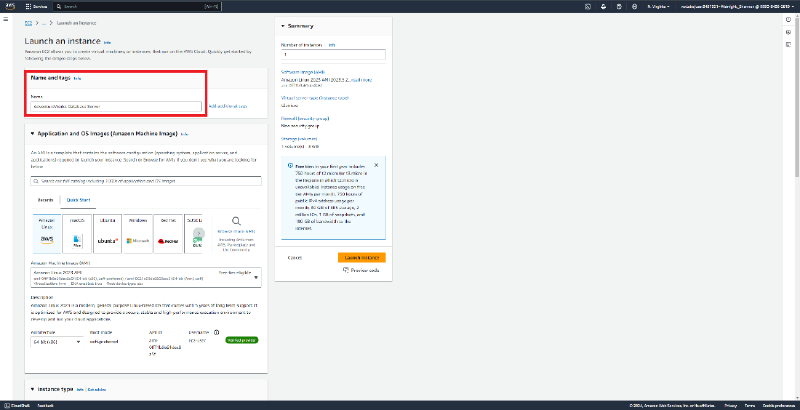
Launch an instancewebpage open, click the text box in theName and tagsoption section and name the serverAdventureWorks Database Server
- Click the text box in the
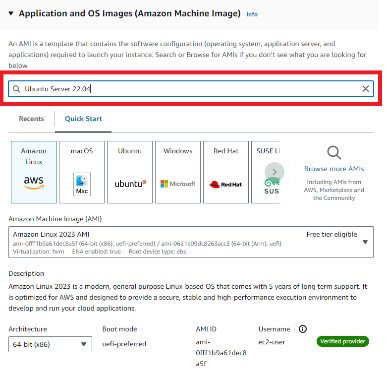
Application and OS Images (Amazon Machine Image)option section and typeUbuntu Server 22.04– pressEnterto search for the image file.
- In the results panel from the search, click the
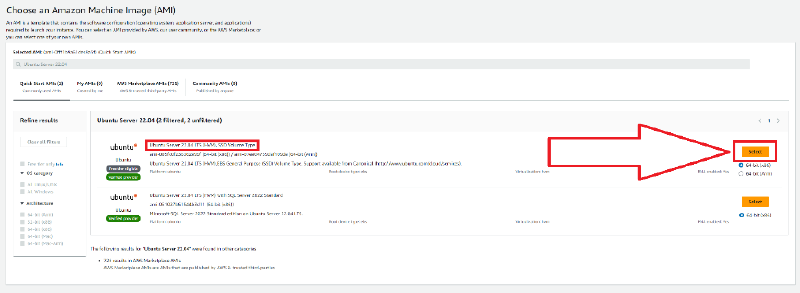
Selectbutton to select theUbuntu Server 22.04 LTS (HVM), SSD Volume Typemachine image. Ensure that the machine image matches the description and screenshot of the following image provided:
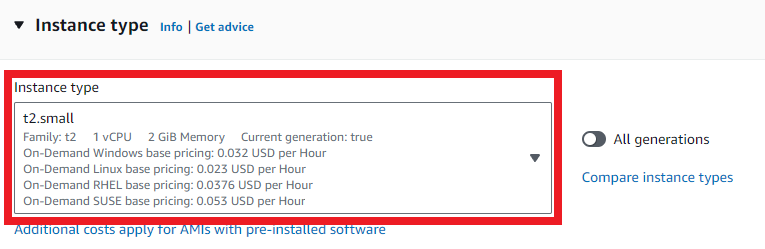
- After selecting the machine image, you will be returned to the previous screen. Scroll down to the Instance type box change the instance type to
t2.smallfrom the list of options in the box.
The default selection will be
t2.micro. Ensure that this is changed before proceeding.
Creating a Key Pair#
This section addresses creating a key pair to be used for the database and web server virtual machines and is a continuation part to creating the first virtual machine.
- After selecting the instance type, scroll down to the
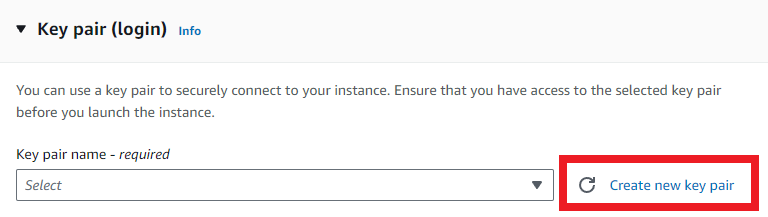
Key pair (login)box. From here, at the bottom right of the box, clickCreate new key pair
- In the window that appears, ensure the following conditions are met:
Key pair name: adventureworks_keypair

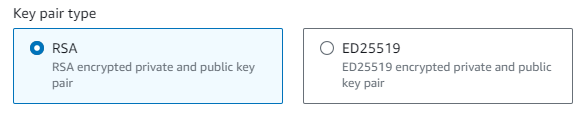
Key pair type: RSA
Private key file format: .ppk
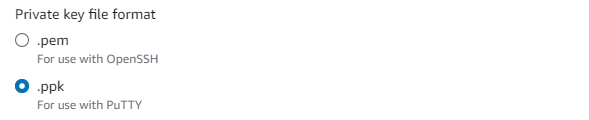
This is important to ensure that the keypair will work with the PuTTY application we will use later for managing and deploying the database and web servers. If the AdventureWorks development team decides to use a different file format for another - application, that keypair will need to be added later.
- Click
Create key pair. The key pair will automatically download itself to your local storage device. This is usually located in theDownloadsfolder unless specified elsewhere.

Keep this file safe, as it is what allows the servers to be managed by other devices. We recommend moving the file to the AdventureWorks secure vault, as well as employing standard encryption techniques. See the AdventureWorks project manager for assistance if needed.
Creating (2) Virtual Machines with AWS EC2 (Cont. 1)#
This is a continuation of creating the virtual machines and comes after creating the key pair.
- After the key pair is created and downloaded, you will be returned to the main
Launch an instancedashboard to continue. Scroll down to theNetwork settingsbox and clickCreate security group. This will expand the network options.

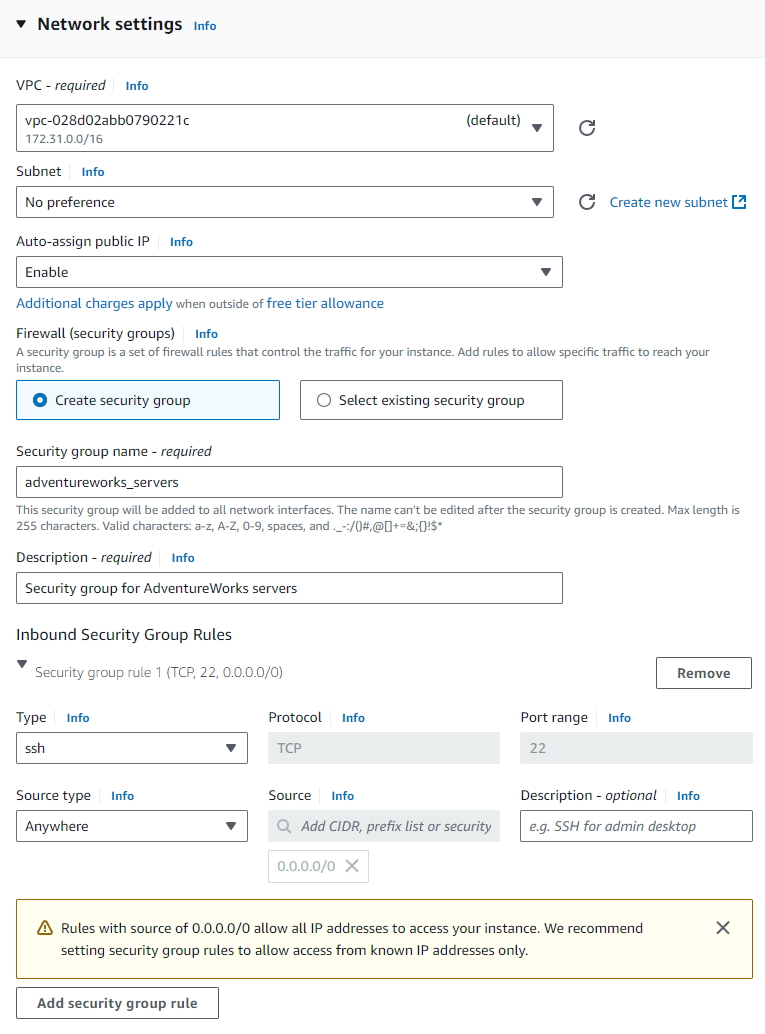
- With the network options expanded, ensure the following conditions are met:
Firewall (security groups): Create new security group

Security group name: adventureworks_servers

Description: Security group for AdventureWorks servers

Remain in this section for the next section of the documentation.
Creating a Security Group#
This section addresses creating a security group to be used for the database and web server virtual machines and is a continuation part to creating the first virtual machine.
- In the
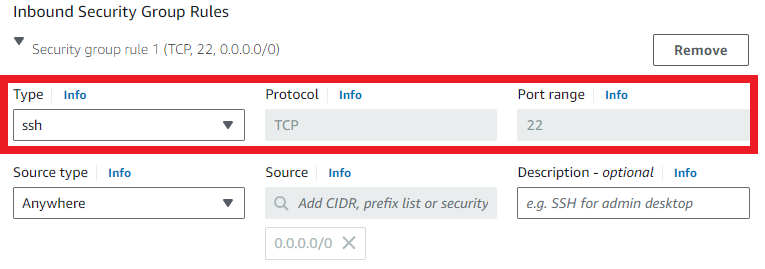
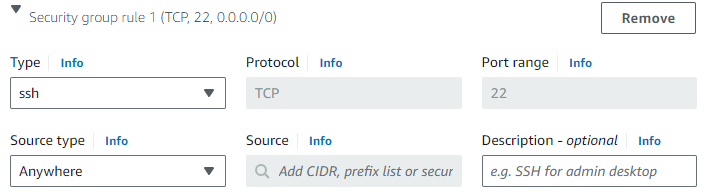
Network settingsbox, underInbound Security Group Rules, ensure that the default SSH rule is enabled.
- At the bottom of the
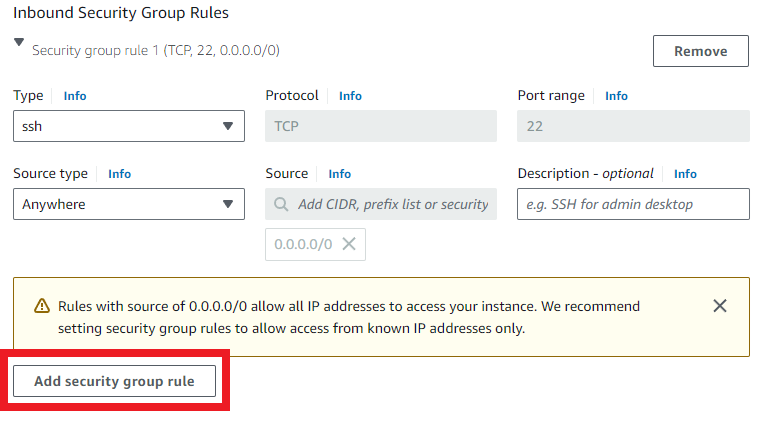
Inbound Security Group Rulessection, clickAdd security group rule
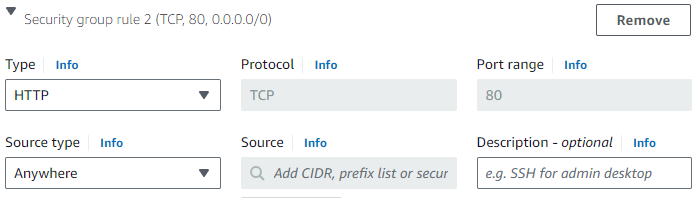
- A new security group rule will be created named
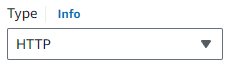
Security group rule 2By using the drop-down boxes, configure this rule with the following settings:
Type: HTTP
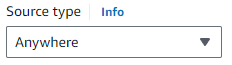
Source type: Anywhere
- After configuring these settings, click
Add security group ruleagain to add another rule.

- A new security group rule will be created named
Security group rule 3By using the drop-down boxes, configure this rule with the following settings:
Type: Custom TCP
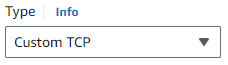
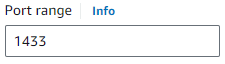
Port range: 1433
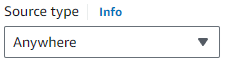
Source type: Anywhere
- After configuring these settings, click
Add security group ruleagain to add another rule.

- A new security group rule will be created named
Security group rule 4By using the drop-down boxes, configure this rule with the following settings:
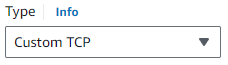
Type: Custom TCP
Port range: 1433
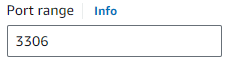
Source type: Anywhere
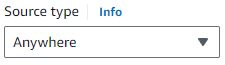
- Ensure that all (4) security rules match the following settings derived from the provided screenshots:
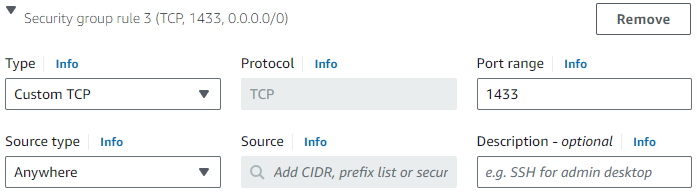
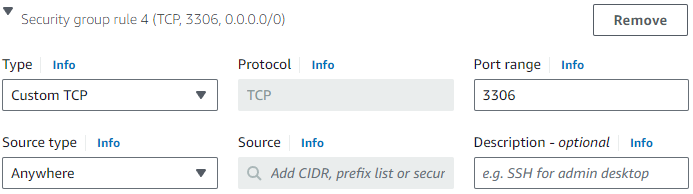
Leave this page open for the next section of this documentation.
Creating (2) Virtual Machines with AWS EC2 (Cont. 2)#
This is a continuation of creating the virtual machines and comes after creating the security group.
- After all (4) security rules have been added, scroll down to the
Configurestorage section. In the text box containing8, change this value to15.

- On the lower right side of the
Summarysection, clickLaunch instanceto create theDatabase Server virtual machine.
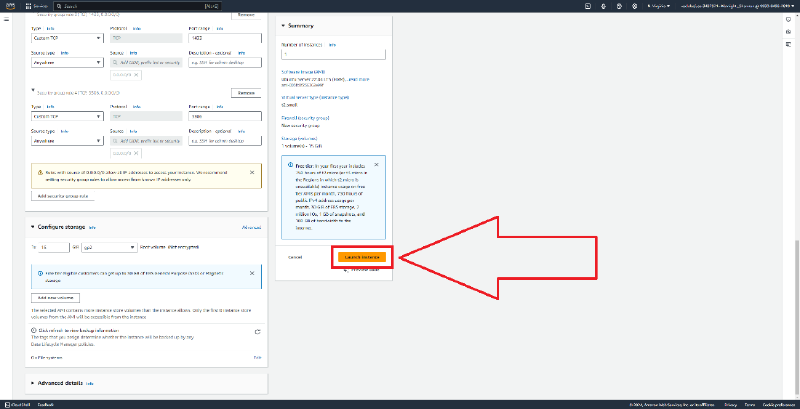
The Database Server virtual machinewill take a few minutes to build and load. Please be patient. Once initialized, theDatabase Server virtual machinehas been successfully created. We are now ready to create theWeb Server virtual machine.


- On the
AWS dashboard, select theServicesbutton on the upper left side of the page. This will open theServicestab, a quick overview link to the services AWS provides.
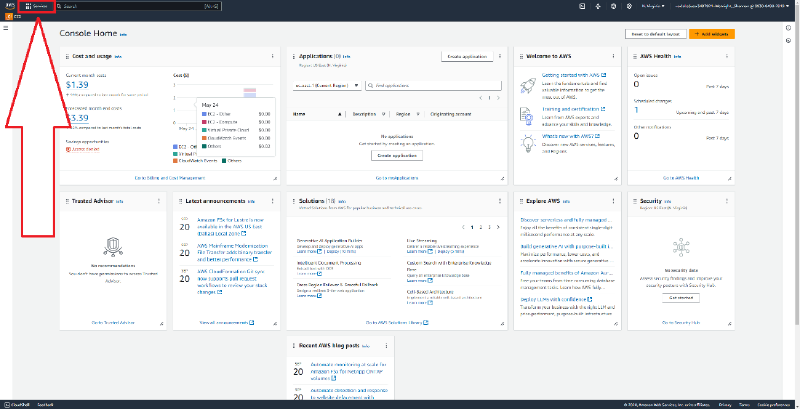
- With the
Servicestab open, select theEC2button.
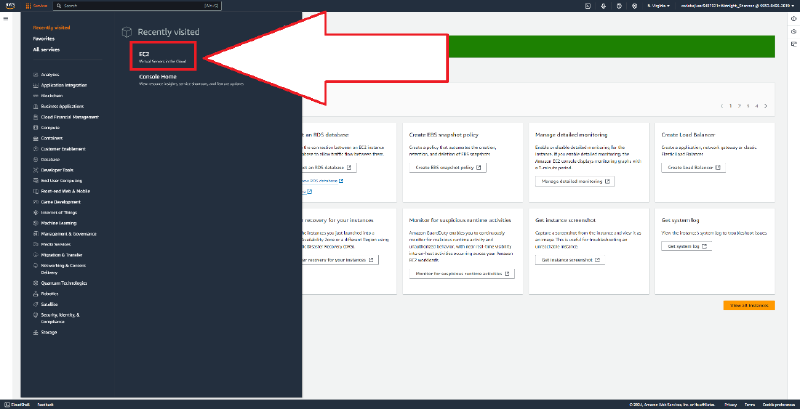
- With the
EC2 Compute Servicedashboard open, clickLaunch instance
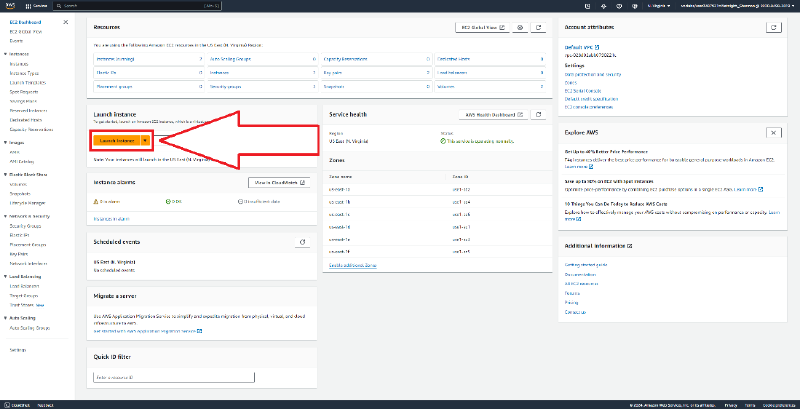
- With the
Launch an instancewebpage open, click the text box in theName and tagsoption section and name the serverAdventureWorks Web Server
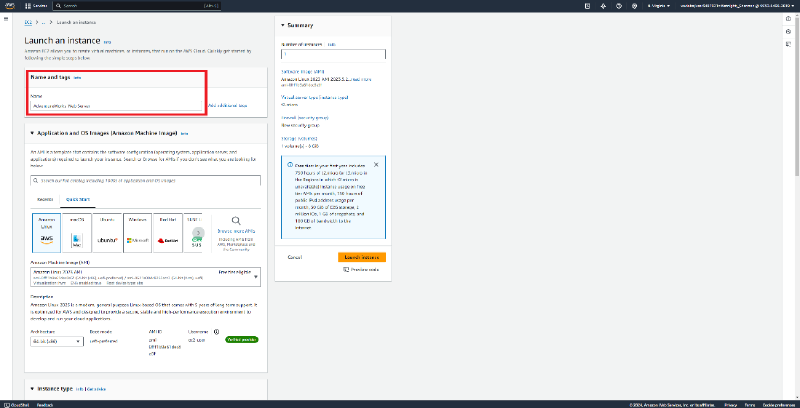
- Click the text box in the
Application and OS Images (Amazon Machine Image)option section and typeUbuntu Server 22.04. PressEnterto search for the image file.
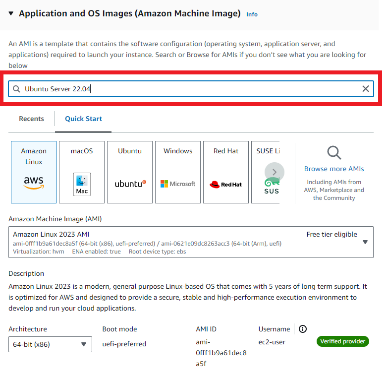
- In the results panel from the search, click the
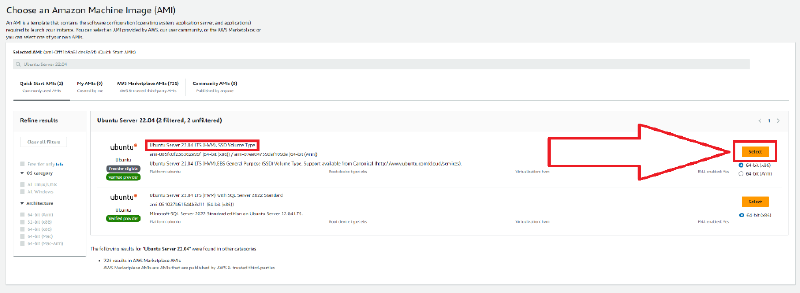
Selectbutton to select theUbuntu Server 22.04 LTS (HVM), SSD Volume Typemachine image. Ensure that the machine image matches the description and screenshot of the following image provided:
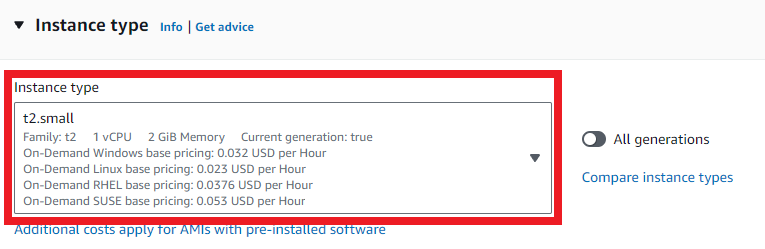
- After selecting the machine image, you will be returned to the previous screen. Scroll down to the Instance type box change the instance type to
t2.smallfrom the list of options in the box.
The default selection will be
t2.micro. Ensure that this is changed before proceeding.
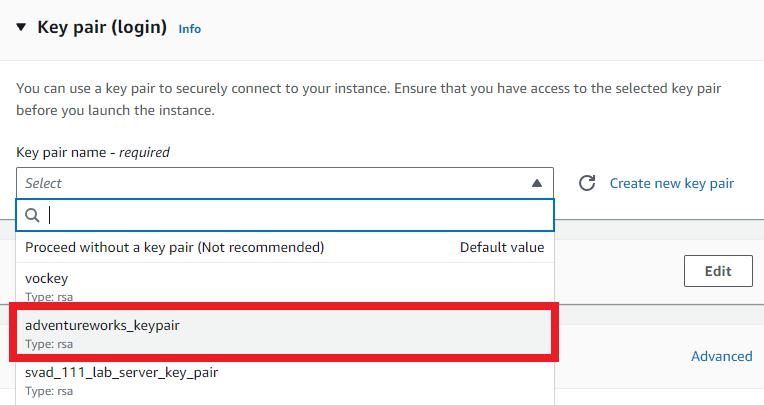
- Scroll down to the
Key pair (login)box. Here, we are going to use the key pair we created in a previous step. Click thedrop-down boxand select theadventureworks_keypairoption.
- After selecting the key pair, scroll down to the Network settings box. Here, we are going to use the security group we created in a previous step. Click the
Select existing security groupoption underFirewall (security groups).
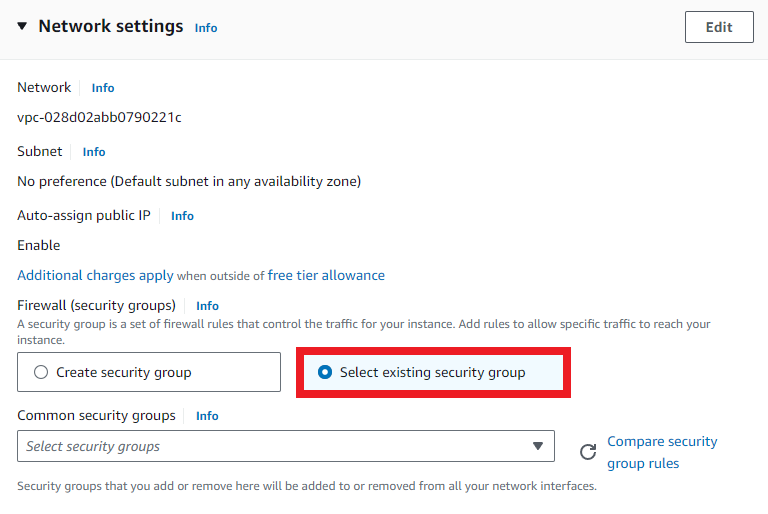
- Click the
drop-down boxunderCommon security groupsand selectadventureworks_servers
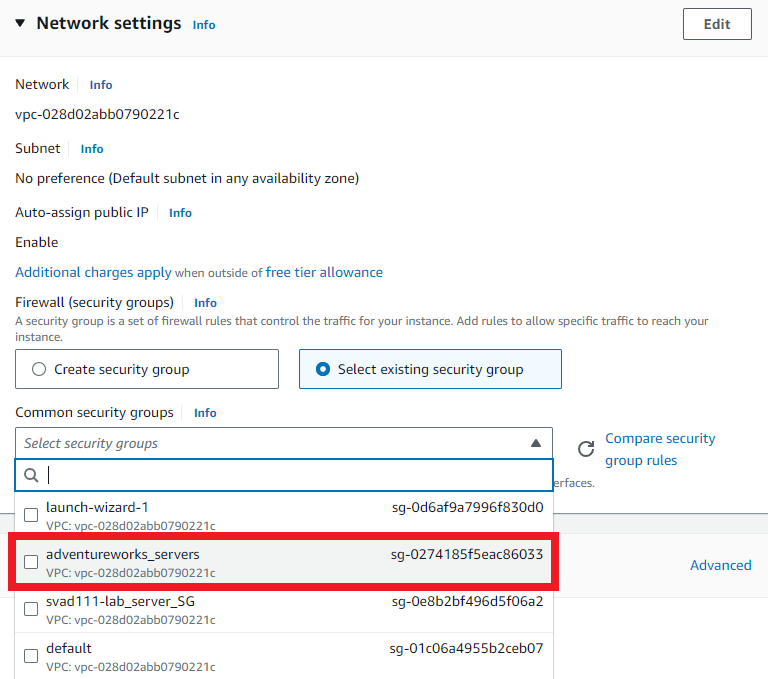
- After selecting the security group, scroll down to the
Configure storagesection. In the text box containing8, change this value to15.

- On the lower right side of the
Summarysection, clickLaunch instanceto create theWeb Server virtual machine.
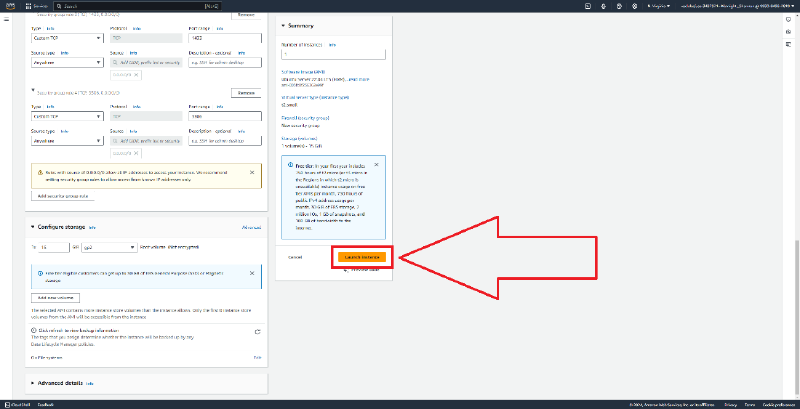
- The
Web Server virtual machinewill take a few minutes to build and load. Please be patient. Once initialized, theWeb Server virtual machinehas been successfully created.


At this point in the documentation, both virtual machines have been created. We need to connect to these instances with PuTTY and begin the setup process.
Downloading and Installing PuTTY#
This section covers downloading the SSH/Telnet client PuTTY and installing the application. This documentation assumes the computer being used for this setup is a Windows 10/11 machine, and that the user has a basic working knowledge level of file structures and can navigate to and launch executable files, as well as walkthrough basic installers.
Download the PuTTY client by navigating to the following link: PuTTY
Click on the latest version of the PuTTY installer for Windows. This documentation assumes the computer being used for this setup is a Windows 10/11 machine with x86 Architecture.
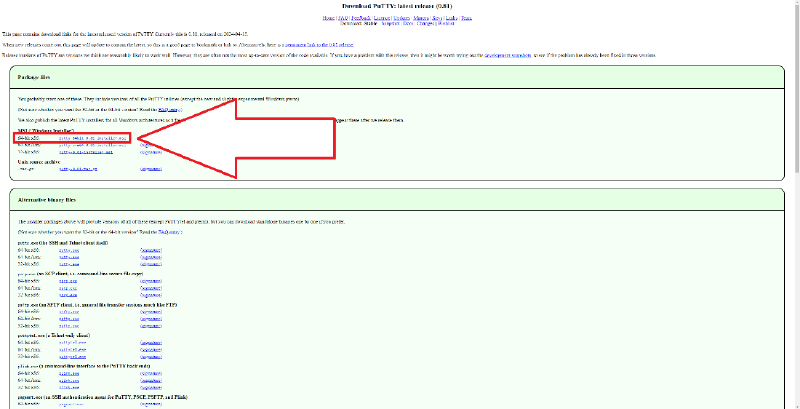
- Navigate to the installer after downloading and double-click the file to launch the PuTTY Setup Wizard.
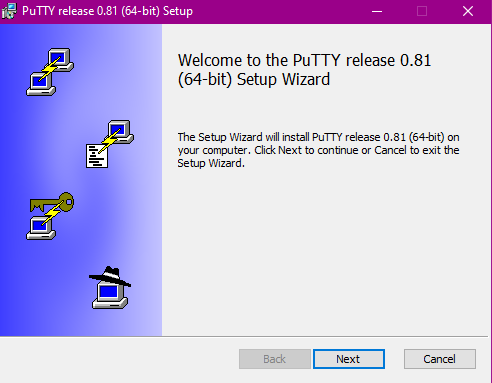
Walk through the installer and leave all default options.
Launch the PuTTY Application after installation if it does not automatically start.
Adding the Key Pair to PuTTY#
This section covers configuring the key pair for use in PuTTY when connecting to the virtual machines we created earlier. This documentation assumes the computer being used for this setup is a Windows 10/11 machine, and that the user has a basic working knowledge level of file structures and can navigate to the appropriate files for use in.
With PuTTY open, on the left-hand side of the application window, expand
Connectionif not already expanded.Scroll down to
SSHand expand if not already expanded.
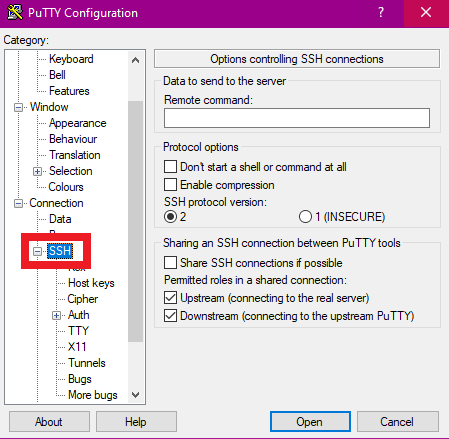
- Scroll down to
Authand expand if not already expanded.
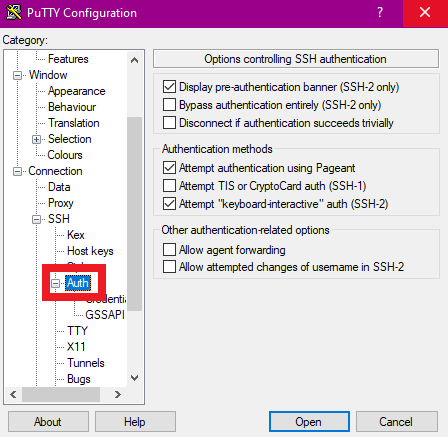
- Click
Credentials. SelectBrowseunderPrivate key file for authentication, then select the key pair that was created earlier in the key pair creation step. You may have to navigate to this key pair or decrypt it if it has been kept in the AdventureWorks Vault. See the AdventureWorks project manager if you have difficulty finding this key pair.
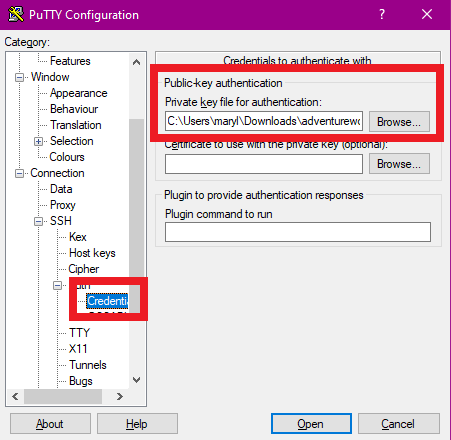
- When done, scroll to the top of the
Categorywindow on the left-hand side of the PuTTY Application and clickSession
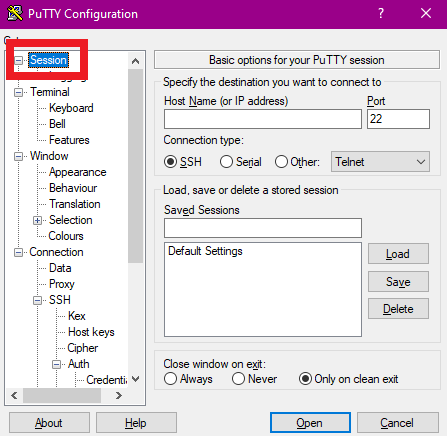
Leave the PuTTY Application open for the next part of this documentation.
Connecting to the EC2 Instances via PuTTY#
This section covers how to connect to the EC2 instances (virtual machines) for later use. This documentation assumes that the user understands how to use the PuTTY SSH/Telnet Client to connect to the EC2 instances after reading this section and will not re-iterate throughout the remainder of the technical documentation. Please refer to this section as often as necessary.
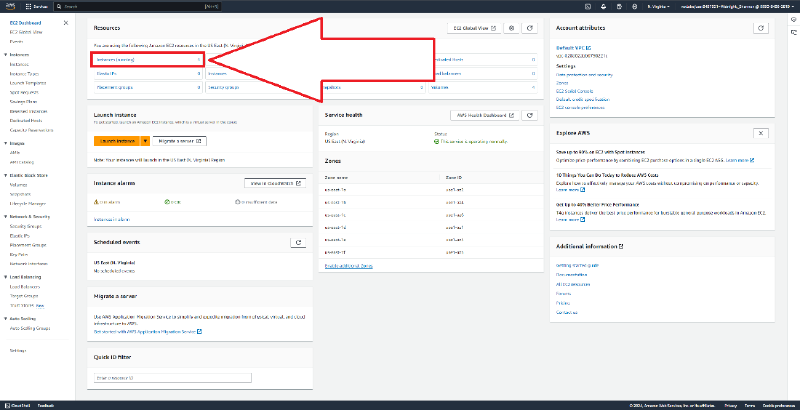
- To connect to the AdventureWorks Database Server, navigate back to the
EC2 Compute Servicesdashboard, then clickInstances (running)
- On the
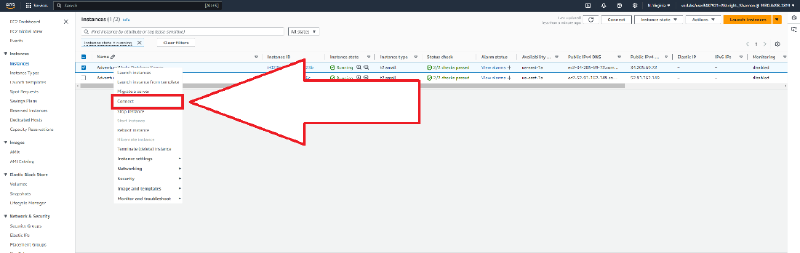
Instancesdashboard, right click theAdventureWorks Database Serverand clickConnectto open the connection page.
- Click the
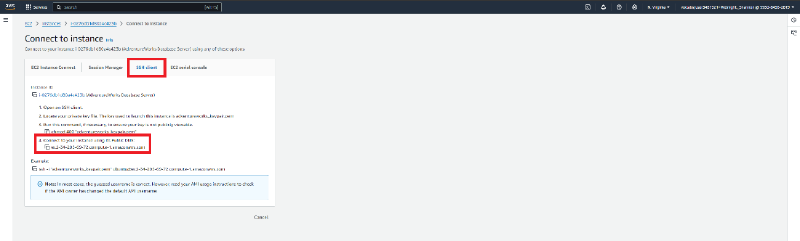
SSH clienttab on theConnect to instancepage to view the connection instructions. At the bottom of the steps, copy thePublic DNSinformation using either the copy button next to the information, or by highlighting the information and copying withCTRL + C.
- In the
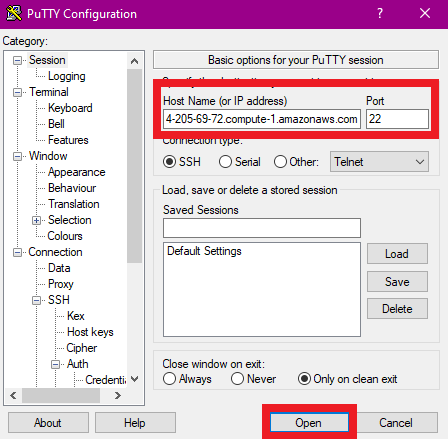
PuTTY Applicationwindow, paste thePublic DNSinformation from Step 3 into the text box for theHost Name (or IP address)section on the right-hand side. Ensure the port number is set to22. ClickOpento log into the AdventureWorks Database Server.
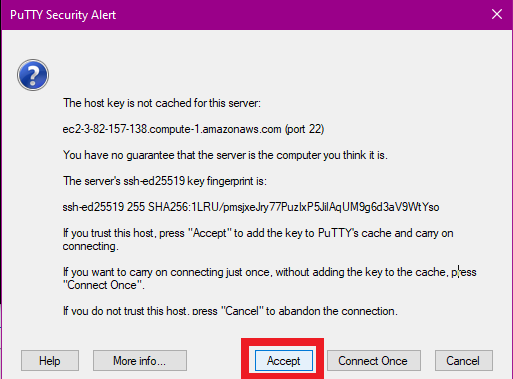
- A window will appear, notifying us that the host key is not cached for this server. Click
Acceptto cache the host key.
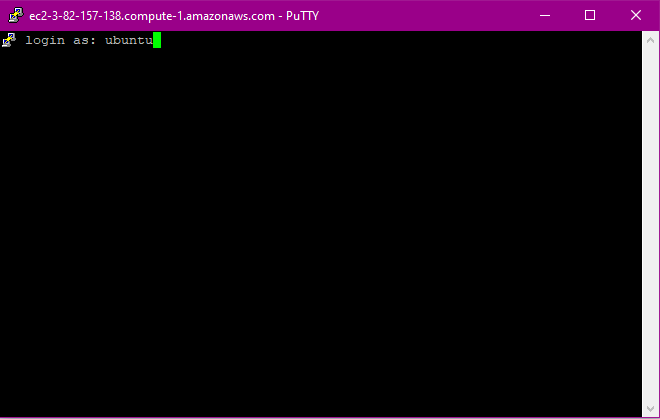
- When the interface loads, you will see
login as:. Typeubuntu(the default username) and pressEnter.
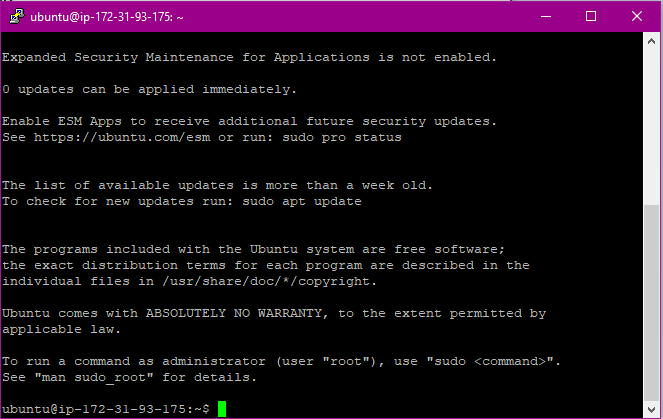
- You are now logged into the AdventureWorks Database Server.
- Leave this connection open for the next part of this documentation. Do not close the PuTTY Client or the AdventureWorks Database Server connection.
The remaining portion of this document assumes that you understand how to log into the appropriate server instance when asked. Logging in with PuTTY and its associated steps will not be reiterated again throughout the remainder of the tutorial.
Connecting to the Web Server follows the exact same process as this, albeit clicking on the Web Server EC2 instance to find the connection details instead of the Database.
Reply by EmailPlease refer to this section as many times as needed.